
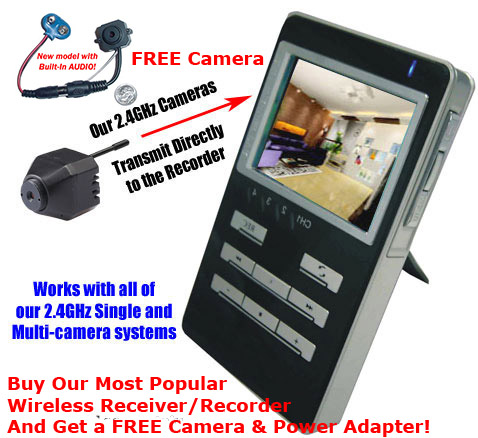
 The P-160 Portable 2.4GHz Wireless Receiver/Recorder is a perfect handheld DVD recorder and player that is used with a Mini Spy Camera to record both Video and Audio. It fits in the palm of your hand and is about the same size as a small portable radio. It’s great for portable on-the fly surveillance missions because it be used anywhere with up to 4 Mini Spy Cameras. The caveat is you must select 1 of 4 cameras to record at a time not all 4 cameras at once. You can plant 4 cameras where ever you need to spy on anyone or anything. The Mini Spy Camera can transmit to a range of 600ft if it in line of site directly in the path but expect less due to various factors like wall and ceilings.
While the small manual that comes with the P-DVR explains things pretty well this article will server to instruct the new user on it’s functions and operations in fair detail.
Before you use the Portable Spy Camera DVD Receiver-Recorder you must plug in the power cord charger into the side of the unit and and an AC outlet to charge for around 4 hours.
First of all the unit comes by default with 128 Mb of built in memory but to get long recorders the unit can record for a much longer time and can support up to 2 GB of SD memory which will allow the PVR to record up to 32 hours. The P-DVR uses a Secure Digital memory card that is inserted at the top and only fits 1 way so you can’t get it wrong.
The are 2 modes of operation RECORD and PLAYBACK and there is a small switch at the top right labeled R for record and P for play.
To turn the PVR on simple press the button on the left top. The button has a small O with a line through it.
Before you start to record with you spy cam make sure you have you battery plugged in to your mini spy camera or power adapter plugged into the camera and the electrical socket to power the mini cam.
You should see the image from the wireless mini spy cam on the 2.5″ PVR screen. Now if you just see static that means the mini spy cam is transmitting on a different frequency and you need to set the channel on the P-DVR. To change the channel make sure the unit is turned on and the top switch is set to R for record. Then press the top left silver key that has 2 opposing arrows shown on the face you will see a blue light indicating which channel the unit is to record on.
To record simply press the silver REC button on the top right face of the display, you will see a red dot on the top left of the screen and the number of minutes and seconds how long the record is so far.
To Stop recording simply press the silver REC button again. If the memory on the P-DVR is full the recording will stop automatically which makes sense.
Playing the recording that you made.
After recording is finished the file will be kept on the P-DVR in the file folder:
Media – DCIM\100COACH folder with the files named PICT001, PIC002 as MPEG files in AVI format.
Set the small switch at the top right to P for play.
You should see Media displayed in the center of the display screen. If it isn’t press the middle right silver button marked with 2 right arrows and a vertical bar >>|. Press it until you see the word Media displayed in the center. Now press the silver key marked with the symbol >| which will display the File Explorer. You will see four entries as shown below.
MP3
VIDEO
DCIM
PHOTO
Cycle to the DCIM entry by pressing the silver key with the minus (–) symbol .
Press the sliver button with the symbol >|.
Press the key with silver key with the minus (–) symbol to select 100COACH entry. Then press key with symbol >| which is like and enter key.
You will see 1 or more files that start with PIC and have the .AVI extension. Press the silver key with the minus (–) sign to hi-light the file and press the enter key with the >| symbol. the file will play and if you don’t press the silver stop key marked with the black square symbol the file keep replaying.
Turn the power switch off when not in use. Now we will show you how to download the video and audio files to your PC so that you can save all your precious spy camera surveillance video/audio.
Open up the small rubber door at the bottom of the P-DVR and connect the small USB connector cable in the right most connector. Connect the other end of the USB cable connector into any available PC port.
You will see “Found New Hardware” and then “Your New Hardware is Installed and Ready to Use” in the status bar of your PC.
Open a Windows Explorer window and you will see the hard drive with the
same folder/files with .AVI extension as described above.
Now you have it, the basics of recording and downloading .AVI files from the world’s smallest and most portable DVR for capturing all those surveillance spy video/audio moments.
| New Products | |
   |
   |
  |
  |
  |
  |
| Top Featured Products | |
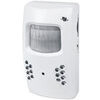 Motion Detector Alarm Color Hidden Camera With Built-In DVR - Mini Alarm DVR with PIR Detection & Motion Detection The PIR MOTION DETECTOR HIDDEN CAMERA with built-in DVR is the best on the market. It doesn't just look... Motion Detector Alarm Color Hidden Camera With Built-In DVR Motion Detector Alarm Color Hidden Camera With Built-In DVR - Mini Alarm DVR with PIR Detection & Motion Detection The PIR MOTION DETECTOR HIDDEN CAMERA with built-in DVR is the best on the market. It doesn't just look... Motion Detector Alarm Color Hidden Camera With Built-In DVR |
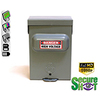 SecureShot 1080p High-Def Electrical Box Hidden Camera/DVR w/NightVision - This ultimate electrical box SecureShot DVR offers features others only imagine. Our 940nm invisible IR illuminator array records in total darkness... SecureShot 1080p High-Def Electrical Box Hidden Camera/DVR w/NightVision SecureShot 1080p High-Def Electrical Box Hidden Camera/DVR w/NightVision - This ultimate electrical box SecureShot DVR offers features others only imagine. Our 940nm invisible IR illuminator array records in total darkness... SecureShot 1080p High-Def Electrical Box Hidden Camera/DVR w/NightVision |
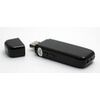 USB Camstick Spy Camera w/Night Vision - The CamstickNV looks and functions like an ordinary flash drive. Yet this storage device conceals a DVR capable of recording both audio and quality color video.Motion activation mod... USB Camstick Spy Camera w/Night Vision USB Camstick Spy Camera w/Night Vision - The CamstickNV looks and functions like an ordinary flash drive. Yet this storage device conceals a DVR capable of recording both audio and quality color video.Motion activation mod... USB Camstick Spy Camera w/Night Vision |
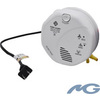
 SecureShot First Alert Smoke Detector Camera/DVR w/NightVision & 1 Year Battery - Our SecureShot Full High Definition 1080P Smoke Detector w/ 1 Year Standby Battery Camera/DVR is MADE IN USA. It features Amazing 1080P Full... SecureShot First Alert Smoke Detector Camera/DVR w/NightVision & 1 Year Battery SecureShot First Alert Smoke Detector Camera/DVR w/NightVision & 1 Year Battery - Our SecureShot Full High Definition 1080P Smoke Detector w/ 1 Year Standby Battery Camera/DVR is MADE IN USA. It features Amazing 1080P Full... SecureShot First Alert Smoke Detector Camera/DVR w/NightVision & 1 Year Battery |
 Cross Hidden Spy Camera w/Built in DVR - The Cross Hidden Spy Camera with built in DVR is a tiny spy camera hidden inside a mini wearable cross. Cross Hidden Spy Camera w/Built in DVR Cross Hidden Spy Camera w/Built in DVR - The Cross Hidden Spy Camera with built in DVR is a tiny spy camera hidden inside a mini wearable cross. Cross Hidden Spy Camera w/Built in DVR |
 Bush Baby Wifi Outlet - This functional 6 plug wall outlet can support up to six devices and even comes with two functional USB ports and comes in Black or White color. With this built in hidden camera you can keep track ... Bush Baby Wifi Outlet Bush Baby Wifi Outlet - This functional 6 plug wall outlet can support up to six devices and even comes with two functional USB ports and comes in Black or White color. With this built in hidden camera you can keep track ... Bush Baby Wifi Outlet |
 Mini Phone Charger Spy Camera/DVR - Functional phone charger. Our NEW Mini Charger Spy Camera/DVR is a small but powerful device. It offers Hi-Definition 1080p recording resolution hidden discreetly inside a functional ... Mini Phone Charger Spy Camera/DVR Mini Phone Charger Spy Camera/DVR - Functional phone charger. Our NEW Mini Charger Spy Camera/DVR is a small but powerful device. It offers Hi-Definition 1080p recording resolution hidden discreetly inside a functional ... Mini Phone Charger Spy Camera/DVR |
 Bush Baby Stealth Hi-Def Outlet Spy Camera/DVR - FREE 16GB Micro SD Card - This wall adapter is perfect for just about any location. Its built-in camera on the front is positioned so that this ordinary looking object can b... Bush Baby Stealth Hi-Def Outlet Spy Camera/DVR - FREE 16GB Micro SD Card Bush Baby Stealth Hi-Def Outlet Spy Camera/DVR - FREE 16GB Micro SD Card - This wall adapter is perfect for just about any location. Its built-in camera on the front is positioned so that this ordinary looking object can b... Bush Baby Stealth Hi-Def Outlet Spy Camera/DVR - FREE 16GB Micro SD Card |
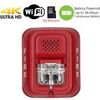 Secureguard 4K Ultra HD WiFi Battery Powered Fire Alarm Strobe Spy Camera - - 4K Resolution Battery Powered Spy Camera This Fire Strobe is WiFi enabled with a 4K Spy camera inside.You can remotely view and control the cam... Secureguard 4K Ultra HD WiFi Battery Powered Fire Alarm Strobe Spy Camera Secureguard 4K Ultra HD WiFi Battery Powered Fire Alarm Strobe Spy Camera - - 4K Resolution Battery Powered Spy Camera This Fire Strobe is WiFi enabled with a 4K Spy camera inside.You can remotely view and control the cam... Secureguard 4K Ultra HD WiFi Battery Powered Fire Alarm Strobe Spy Camera |
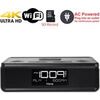 Secureguard 4K Ultra HD WiFi iPhone Dock Radio Spy Camera - Our Secureguard 4K Resolution WiFi Spy Camera is an iPhone Dock Radio with WiFi enabled with a 4K Spy camera inside.You can remotely view and control the camera ... Secureguard 4K Ultra HD WiFi iPhone Dock Radio Spy Camera Secureguard 4K Ultra HD WiFi iPhone Dock Radio Spy Camera - Our Secureguard 4K Resolution WiFi Spy Camera is an iPhone Dock Radio with WiFi enabled with a 4K Spy camera inside.You can remotely view and control the camera ... Secureguard 4K Ultra HD WiFi iPhone Dock Radio Spy Camera |
 Bush Baby 4K WiFi Two Camera Smoke Detector Spy Camera/DVR - ON SALE: $30 OFF!Are you looking for a smoke detector that covers all angles of the room? Then look no further. The Bush Baby 4K WiFi Two Camera Smoke Detector S... Bush Baby 4K WiFi Two Camera Smoke Detector Spy Camera/DVR Bush Baby 4K WiFi Two Camera Smoke Detector Spy Camera/DVR - ON SALE: $30 OFF!Are you looking for a smoke detector that covers all angles of the room? Then look no further. The Bush Baby 4K WiFi Two Camera Smoke Detector S... Bush Baby 4K WiFi Two Camera Smoke Detector Spy Camera/DVR |
 Bush Baby 4K WiFi Dog Spy Camera/DVR - The Bush Baby 4K Wi-Fi Dog is the perfect device to protect your young ones. Whether you are making sure your child is staying out of trouble or keeping an eye on the babysitter no o... Bush Baby 4K WiFi Dog Spy Camera/DVR Bush Baby 4K WiFi Dog Spy Camera/DVR - The Bush Baby 4K Wi-Fi Dog is the perfect device to protect your young ones. Whether you are making sure your child is staying out of trouble or keeping an eye on the babysitter no o... Bush Baby 4K WiFi Dog Spy Camera/DVR |

|
|
Be assured that your shopping experience is completely safe. The order site is secured using a Thawte SSL Web Server Certificate which encrypts all data to and from the site. However, if you prefer to pay with check or money order, just choose the off-line option when you check out. |
|