Many companies on the Internet sell pieces of equipment that may or may not work together and many have problems due to quality and most of the surveillance equipment for professional installation are brought in from foreign countries and may not be reliable for very long.
We have found systems that are easy to install and bundled with the best surveillance cameras and computer surveillance software that now any business can have a professional surveillance system to protect their business and premises and even provide 24/7 monitoring over the Internet.
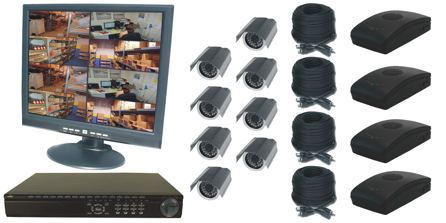 This article will tell you how to install the CS-DVR8CH-GC 8 Channel Wireless Surveillance System. It’s an PC-based 8 channel DVR running Windows XP operating system that is very popular in the industry today. This complete system includes 8 professional industry standard surveillance cameras and the following components.
This complete professional surveillance system allows you to install up to 8 cameras (4 wired and 4 wireless cameras) to digitally record all activity. This DVR has full networking capability and uses a GeoVision DVR card which allows you to view live video on the Internet if you choose. What’s nice about these surveillance systems is the surveillance software is pre-installed on the DVR Recorder! No need to do this yourself and the surveillance equipment is tested and burned in completely before it is shipped. NICE!
Bear in mind, that you need Internet access if want to use this for monitoring surveillance over the Internet, but most businesses have this by default.
1. DVR-8CH-GC
2. LCD Monitor
3. (4) Cameras
4. (4) Wireless Cameras
5. Power Cord
6. Windows XP Pro Disk (Installed)
7. Motherboard/VGA Software Disks (Installed)
8. Surveillance System Software Disk (Installed)
9. (8) BNC to RCA Adaptors
10. CAT-5 Network Cable
11. Keyboard/Mouse
Here is how easy it is to install this system.
Setup the computer:
1. Remove computer from packing.
2. Check that all included items are with the computer.
3. Connect the power cord to the computer power supply. This is located on the back side of the computer. It is a 3 prong black plug.
4. Connect the mouse and keyboard to the matching colored plug on the back of the computer.
5. Connect the LCD monitor to the labeled VGA plug on the back of the computer.
6. If using a network, connect a cable from your modem/network to the LAN connector on the back of the computer.
To connect the cameras, complete the following:The system is capable of connect up to 16 cameras however you can only use 8 of them real time with the 8CH system. 1. Depending on your setup, connect the black dongle to the plug labeled CH 1-8 and the blue dongle to CH 9-16.
2. Connect the included video/power cable (CA-100) to channel 1.
3. The end with a twist on BNC connector connects to the computer.
4. Run the wire to the location of the camera.
5. Connect the male Power plug to the camera and connect the RCA connector to the Video plug form the camera.
6. Go back and connect the male end of a 12v power supply to the female plug on the other end of the CA-100 cable.
7. Repeat step 3-7 for every channel you plan to use a camera on.
Starting up the computer:
1. Turn on the computer with the power button on the front of the computer the green power LED should come on and the red Hard Drive led should begin flashing.
1. After the computer boots up the Surveillance System software will start up.
2. Click on the yellow key icon at the lower left of the program window and select the user login tab.
3. The password is set to a default setting of auto sign in. The password is the same as the hint word, and can be changed later. See user manual file on the desktop.
4. After the program launches you should see the video feed from the connected cameras and video lost for those not connected.
5. You can turn off the video feed from the channels that are not in use. Under the configure tab in the surveillance software select the camera/audio install. Next click on the Activate button. Uncheck the cameras that are not in use then click ok.
6. Make any adjustments to camera locations to get the coverage you need at this time.
7. See the PDF user manual on the desktop for adjusting the settings to your needs.
Wireless Camera Setup:
1. Connect the RCA cable to the receiver.
2. Connect the other end of the RCA cable to one of the open video connectors on the D-plug coming from the computer.
3. Connect the 12v power supply to the receiver.
4. Plug the 12v power supply into wall plug.
5. Turn the power switch on.
6. Check the channel selector. Make sure it’s set to the channel of the camera you are using.
7. Repeat step one through six for any other wireless cameras.
| New Products | |
| Top Featured Products | |
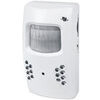 Motion Detector Alarm Color Hidden Camera With Built-In DVR - Mini Alarm DVR with PIR Detection & Motion Detection The PIR MOTION DETECTOR HIDDEN CAMERA with built-in DVR is the best on the market. It doesn't just look... Motion Detector Alarm Color Hidden Camera With Built-In DVR Motion Detector Alarm Color Hidden Camera With Built-In DVR - Mini Alarm DVR with PIR Detection & Motion Detection The PIR MOTION DETECTOR HIDDEN CAMERA with built-in DVR is the best on the market. It doesn't just look... Motion Detector Alarm Color Hidden Camera With Built-In DVR |
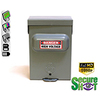 SecureShot 1080p High-Def Electrical Box Hidden Camera/DVR w/NightVision - This ultimate electrical box SecureShot DVR offers features others only imagine. Our 940nm invisible IR illuminator array records in total darkness... SecureShot 1080p High-Def Electrical Box Hidden Camera/DVR w/NightVision SecureShot 1080p High-Def Electrical Box Hidden Camera/DVR w/NightVision - This ultimate electrical box SecureShot DVR offers features others only imagine. Our 940nm invisible IR illuminator array records in total darkness... SecureShot 1080p High-Def Electrical Box Hidden Camera/DVR w/NightVision |
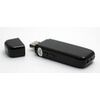 USB Camstick Spy Camera w/Night Vision - The CamstickNV looks and functions like an ordinary flash drive. Yet this storage device conceals a DVR capable of recording both audio and quality color video.Motion activation mod... USB Camstick Spy Camera w/Night Vision USB Camstick Spy Camera w/Night Vision - The CamstickNV looks and functions like an ordinary flash drive. Yet this storage device conceals a DVR capable of recording both audio and quality color video.Motion activation mod... USB Camstick Spy Camera w/Night Vision |
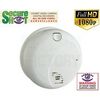 SecureShot First Alert Smoke Detector Camera/DVR w/NightVision & 1 Year Battery - Our SecureShot Full High Definition 1080P Smoke Detector w/ 1 Year Standby Battery Camera/DVR is MADE IN USA. It features Amazing 1080P Full... SecureShot First Alert Smoke Detector Camera/DVR w/NightVision & 1 Year Battery SecureShot First Alert Smoke Detector Camera/DVR w/NightVision & 1 Year Battery - Our SecureShot Full High Definition 1080P Smoke Detector w/ 1 Year Standby Battery Camera/DVR is MADE IN USA. It features Amazing 1080P Full... SecureShot First Alert Smoke Detector Camera/DVR w/NightVision & 1 Year Battery |
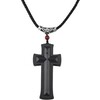 Cross Hidden Spy Camera w/Built in DVR - The Cross Hidden Spy Camera with built in DVR is a tiny spy camera hidden inside a mini wearable cross. Cross Hidden Spy Camera w/Built in DVR Cross Hidden Spy Camera w/Built in DVR - The Cross Hidden Spy Camera with built in DVR is a tiny spy camera hidden inside a mini wearable cross. Cross Hidden Spy Camera w/Built in DVR |
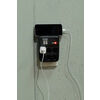 Bush Baby Wifi Outlet - This functional 6 plug wall outlet can support up to six devices and even comes with two functional USB ports and comes in Black or White color. With this built in hidden camera you can keep track ... Bush Baby Wifi Outlet Bush Baby Wifi Outlet - This functional 6 plug wall outlet can support up to six devices and even comes with two functional USB ports and comes in Black or White color. With this built in hidden camera you can keep track ... Bush Baby Wifi Outlet |
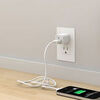 Mini Phone Charger Spy Camera/DVR - Functional phone charger. Our NEW Mini Charger Spy Camera/DVR is a small but powerful device. It offers Hi-Definition 1080p recording resolution hidden discreetly inside a functional ... Mini Phone Charger Spy Camera/DVR Mini Phone Charger Spy Camera/DVR - Functional phone charger. Our NEW Mini Charger Spy Camera/DVR is a small but powerful device. It offers Hi-Definition 1080p recording resolution hidden discreetly inside a functional ... Mini Phone Charger Spy Camera/DVR |
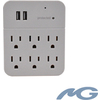 Bush Baby Stealth Hi-Def Outlet Spy Camera/DVR - FREE 16GB Micro SD Card - This wall adapter is perfect for just about any location. Its built-in camera on the front is positioned so that this ordinary looking object can b... Bush Baby Stealth Hi-Def Outlet Spy Camera/DVR - FREE 16GB Micro SD Card Bush Baby Stealth Hi-Def Outlet Spy Camera/DVR - FREE 16GB Micro SD Card - This wall adapter is perfect for just about any location. Its built-in camera on the front is positioned so that this ordinary looking object can b... Bush Baby Stealth Hi-Def Outlet Spy Camera/DVR - FREE 16GB Micro SD Card |
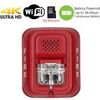 Secureguard 4K Ultra HD WiFi Battery Powered Fire Alarm Strobe Spy Camera - - 4K Resolution Battery Powered Spy Camera This Fire Strobe is WiFi enabled with a 4K Spy camera inside.You can remotely view and control the cam... Secureguard 4K Ultra HD WiFi Battery Powered Fire Alarm Strobe Spy Camera Secureguard 4K Ultra HD WiFi Battery Powered Fire Alarm Strobe Spy Camera - - 4K Resolution Battery Powered Spy Camera This Fire Strobe is WiFi enabled with a 4K Spy camera inside.You can remotely view and control the cam... Secureguard 4K Ultra HD WiFi Battery Powered Fire Alarm Strobe Spy Camera |
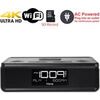 Secureguard 4K Ultra HD WiFi iPhone Dock Radio Spy Camera - Our Secureguard 4K Resolution WiFi Spy Camera is an iPhone Dock Radio with WiFi enabled with a 4K Spy camera inside.You can remotely view and control the camera ... Secureguard 4K Ultra HD WiFi iPhone Dock Radio Spy Camera Secureguard 4K Ultra HD WiFi iPhone Dock Radio Spy Camera - Our Secureguard 4K Resolution WiFi Spy Camera is an iPhone Dock Radio with WiFi enabled with a 4K Spy camera inside.You can remotely view and control the camera ... Secureguard 4K Ultra HD WiFi iPhone Dock Radio Spy Camera |
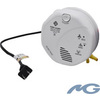 Bush Baby 4K WiFi Two Camera Smoke Detector Spy Camera/DVR - ON SALE: $30 OFF!Are you looking for a smoke detector that covers all angles of the room? Then look no further. The Bush Baby 4K WiFi Two Camera Smoke Detector S... Bush Baby 4K WiFi Two Camera Smoke Detector Spy Camera/DVR Bush Baby 4K WiFi Two Camera Smoke Detector Spy Camera/DVR - ON SALE: $30 OFF!Are you looking for a smoke detector that covers all angles of the room? Then look no further. The Bush Baby 4K WiFi Two Camera Smoke Detector S... Bush Baby 4K WiFi Two Camera Smoke Detector Spy Camera/DVR |
 Bush Baby 4K WiFi Dog Spy Camera/DVR - The Bush Baby 4K Wi-Fi Dog is the perfect device to protect your young ones. Whether you are making sure your child is staying out of trouble or keeping an eye on the babysitter no o... Bush Baby 4K WiFi Dog Spy Camera/DVR Bush Baby 4K WiFi Dog Spy Camera/DVR - The Bush Baby 4K Wi-Fi Dog is the perfect device to protect your young ones. Whether you are making sure your child is staying out of trouble or keeping an eye on the babysitter no o... Bush Baby 4K WiFi Dog Spy Camera/DVR |

|
Be assured that your shopping experience is completely safe. The order site is secured using a Thawte SSL Web Server Certificate which encrypts all data to and from the site. However, if you prefer to pay with check or money order, just choose the off-line option when you check out. |

|


